

Description
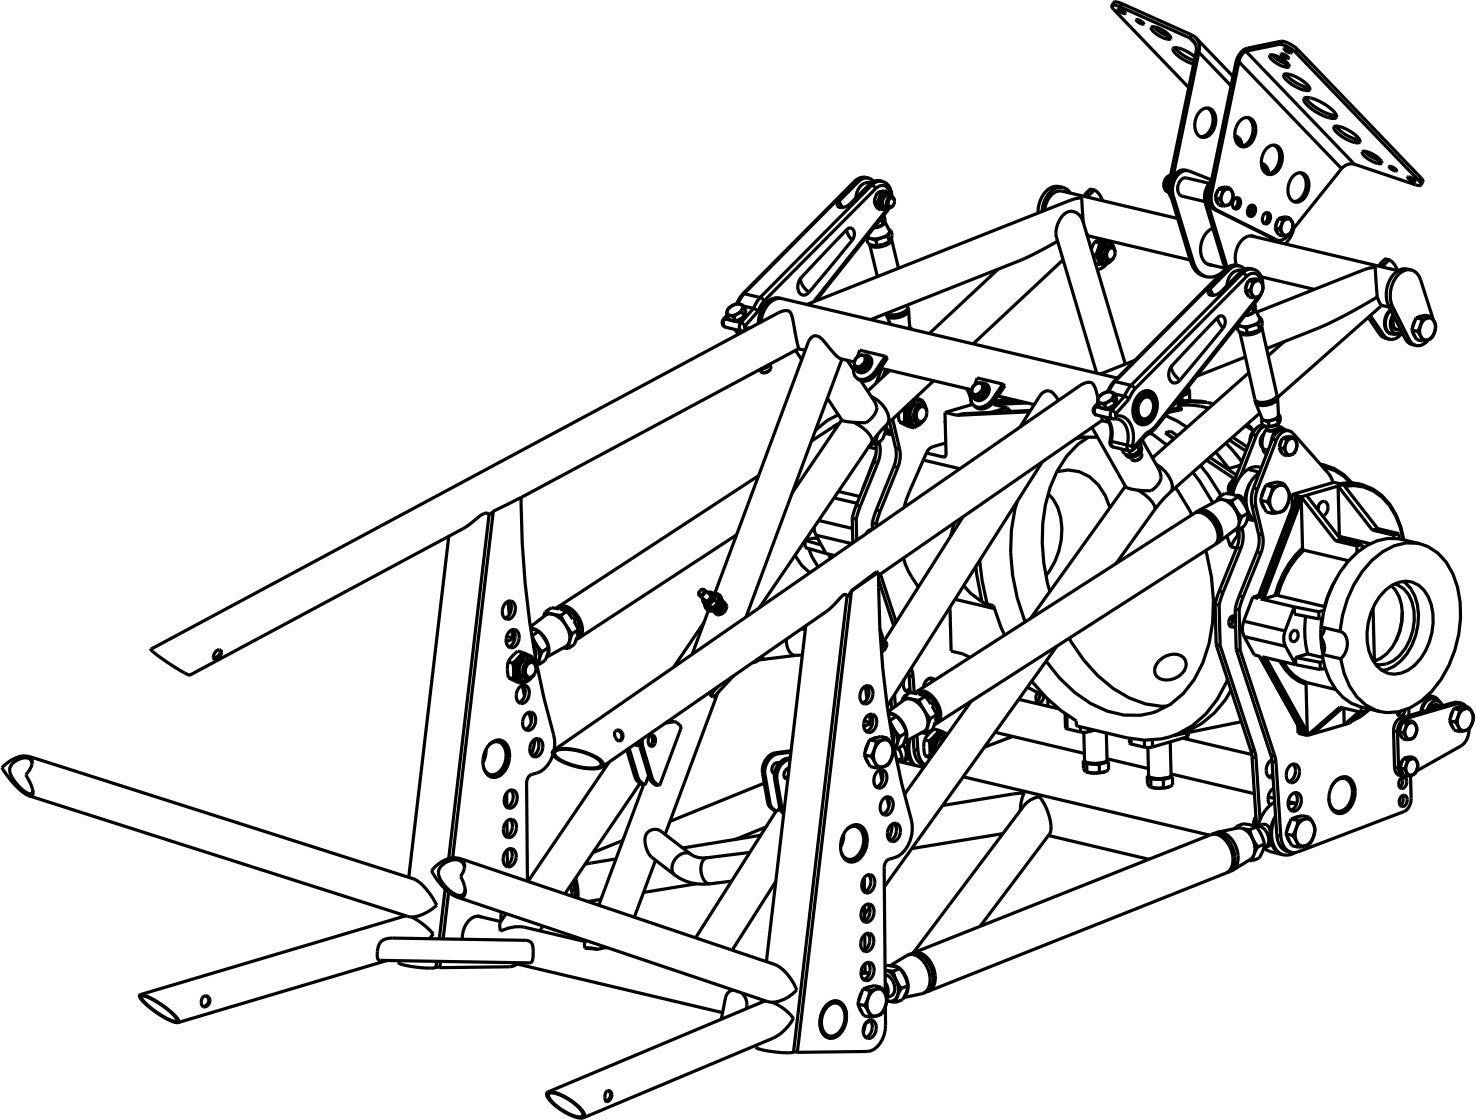
Converts 225″ solid chassis to 235″ swing arm chassis. Rear clip is jig assembled and welded. Spliced to top and bottom rails behind mid-plate.
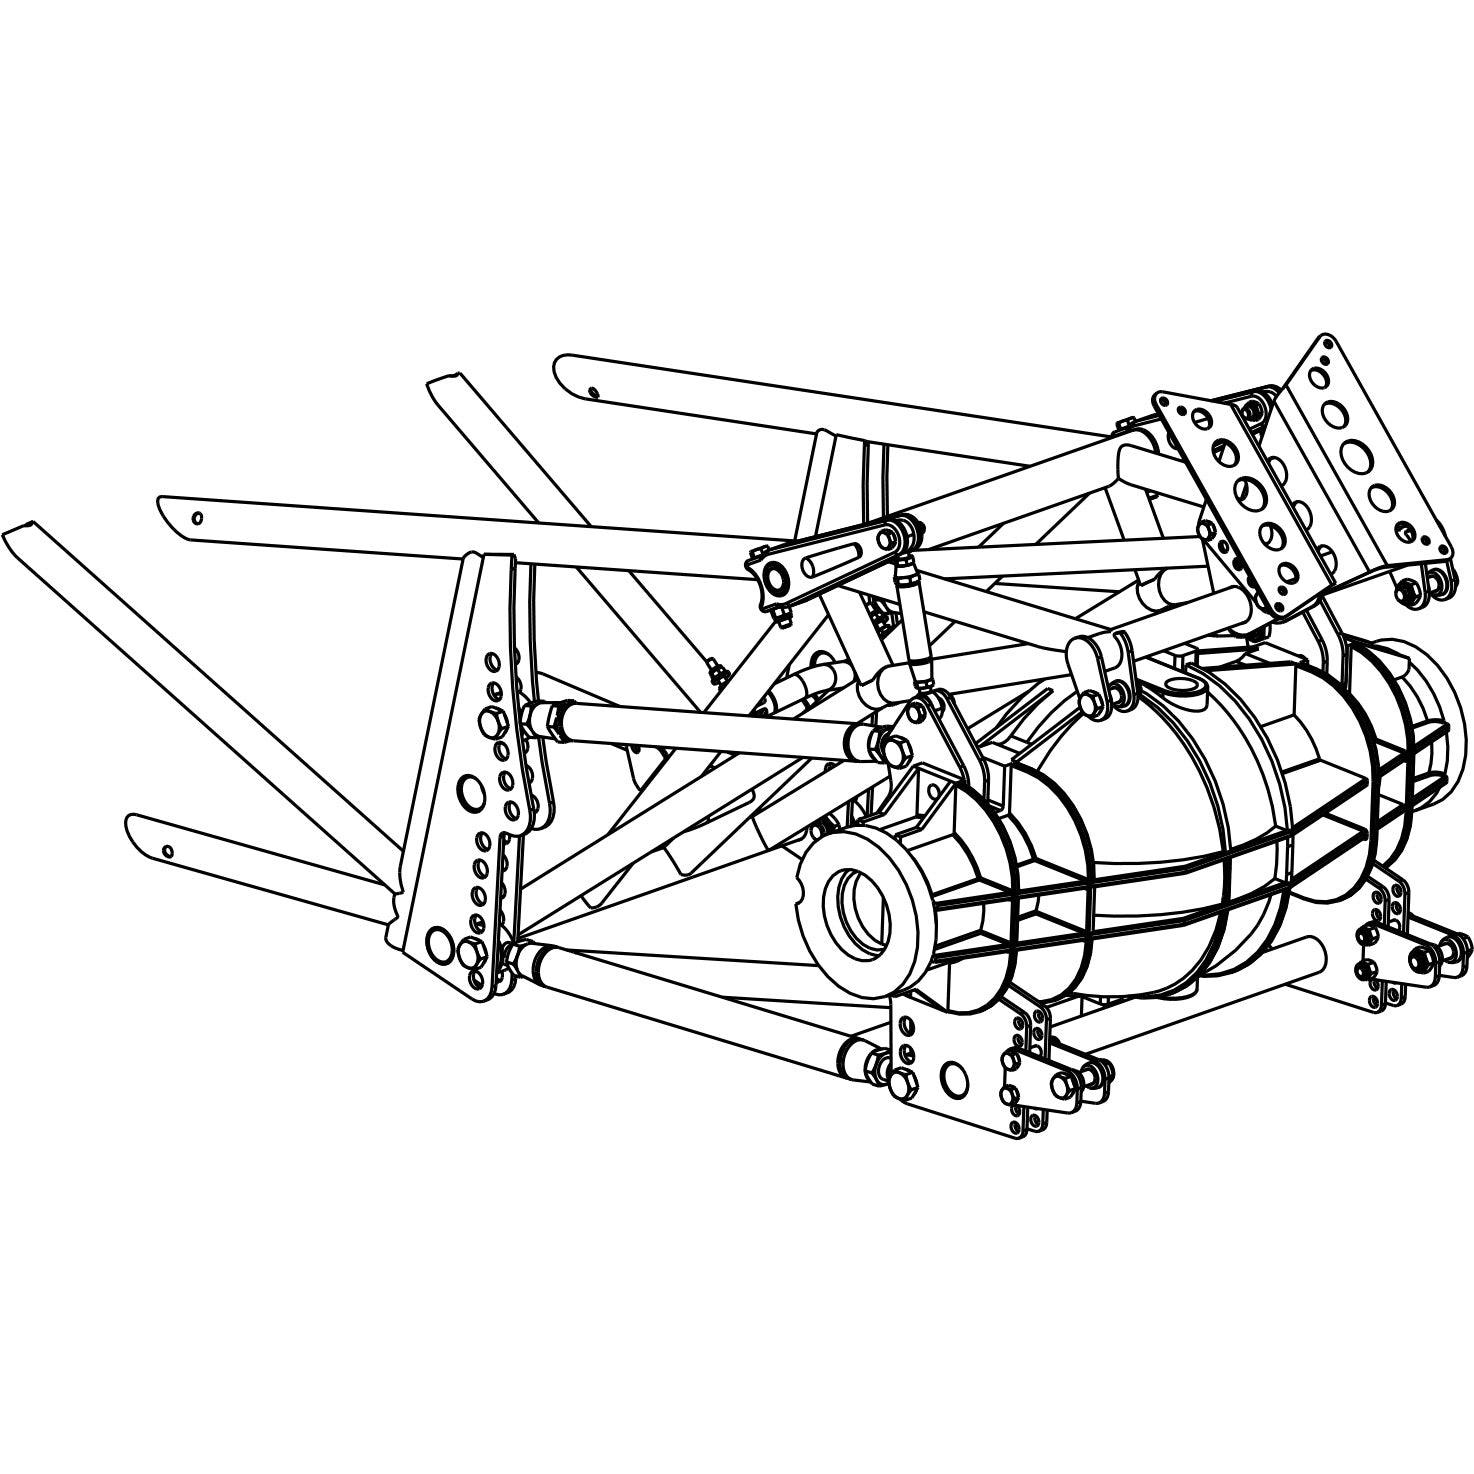
Upper link package with (8) FK chromoly rod ends, torsion bar links, Strange Engineering aluminum 4-link housing, parachute mount, chromoly brackets, adjustable lower shock mounts.
Cutting and welding required.
Note: kit is available without rear housing

Installation Instructions
Initial Chassis Setup
4-Link Bars
Assemble top links so they are 19 7/8" center to center of rod end. Assemble bottom swing arm so that the rod ends are 20 7/16" center to center.
Install top and bottom bars with torsion bar links disconnected.
Top Bars: Use top hole on rear housing bracket. Use 3rd hole down on chassis bracket.
Swing Arm (Bottom Bars): Use bottom hole on rear housing bracket. Use 2nd hole up on chassis bracket.
There should be no pre-load on any of the 4-link bars at this point.
Shocks
Center to center distance of shocks should be 13 1/2" Set both adjuster knobs two (2) clicks in the positive direction. These settings are for Strange Engineering double adjustable shocks. Contact S&W Performance Group or the shock manufacturer if you are not using these shocks.
Preload
Shorten top right 4-link bar two (2) flats. Torsion bar links should be disconnected before preloading 4-link.
Torsion Bar
Install the left torsion bar links with the weight of the car on the suspension. With the link installed there should be no free play between the torsion bar and the rear housing. Remove any play by making the link longer.
Install the right torsion bar link. There should be no free play. Preload the right side torsion bar link without disconnecting the links make the right side link longer by turning it one flat.
Swing arm conversion is to be done with mid-plate bolted in chassis. Remove any cables, wires, fuel line and brake lines from the mid-plate back.
The new top and bottom rear frame rail are designed to slip over the original frame rails. The front of the new tube must be miter cut at 45 degrees. The new rail will also have two 3/8" rossett welds located approximately 1 1/2" from the miter cuts. Drill these tubes before sliding them over the existing frame rails.
Cut Existing Frame Rails
With the mid-plate bolted in and the rear housing removed cut off the existing top and bottom frame rails and the diagonal behind the upright at the motor plate. Cut the top rail off 12" back from the motor plate. Cut the bottom rail of 10" back of the mid-plate.
Carefully clean off any material or paint from the uprights, top frame rails and bottom rails.
Locate the Rear Housing
From the back of the engine block to the gasket surface of the rear housing should be 41 1/8." The height of the rear housing is determined by the crank shaft center line. The gasket surface should be vertical.
Secure the rear housing and the chassis to the jig.
Locate Swing Arm Welded Rear Chassis Clip
The drawing provided with the kit shows dimensions for locating the rear clip. Clamp the rear clip to the jig.
Bend the Bottom Frame Rails
Carefully heat the bottom frame rail just behind the upright at the mid-plate. Heat the tube slowly and evenly.
Do not overheat the tube, it should not get cherry red.
Slip the new bottom rail over the existing rail and pull until it is aligned with the bottom of the 4-Link Brackets.
Do not tack weld the new bottom frame rails yet.
Bend Top Frame Rails
Carefully heat the top frame rail just behind the upright at the mid-plate. Heat the tube slowly and evenly.
Do not overheat the tube, they should not get cherry red.
Slip the new top rail over the existing top rail and pull until it is aligned with the torsion bar tube. The outer edge of the new top rail should be about 1/8" in from the end of the torsion bar tube.
The tops of the 4-Link brackets may require some trimming.
Tack weld the new top rail to the torsion bar tube and 4-Link brackets.
Fit the new Uprights & Diagonals
The new upright fits against the front edges of the 4-link brackets. With the upright against the brackets, slide the tube up against the bottom of the new top frame rail and check the fit. Adjust notch if required.
The new diagonal fits between the new upright and the mid-plate upright. Check fit and adjust notch as needed.
When you are satisfied with the fit and alignment of the tubes and welded rear clip tack weld all the tubes.
The two 3/4" diagonals are used to gusset the corner between the bottom frame rails and lower 4-link crossmember. Tack these in place.
Check all Work
Tack all tube heavily. Weld all joints and rossette welds all around.
S&W Performance Group recommends using .045 diameter ER70S-2 wire.
Specifications
| For Make | |
|---|---|
| For Model | |
| For Year |
You may also like
Recently viewed
S&W Performance Group
Did you find what you are looking for? If you have any questions get in touch.